
The Hayman Reese Brake Controller is a compact, proportional braking system designed for various towing applications․ It features a manual control knob, LED indicators, and easy installation․
1․1 Overview of the Brake Controller
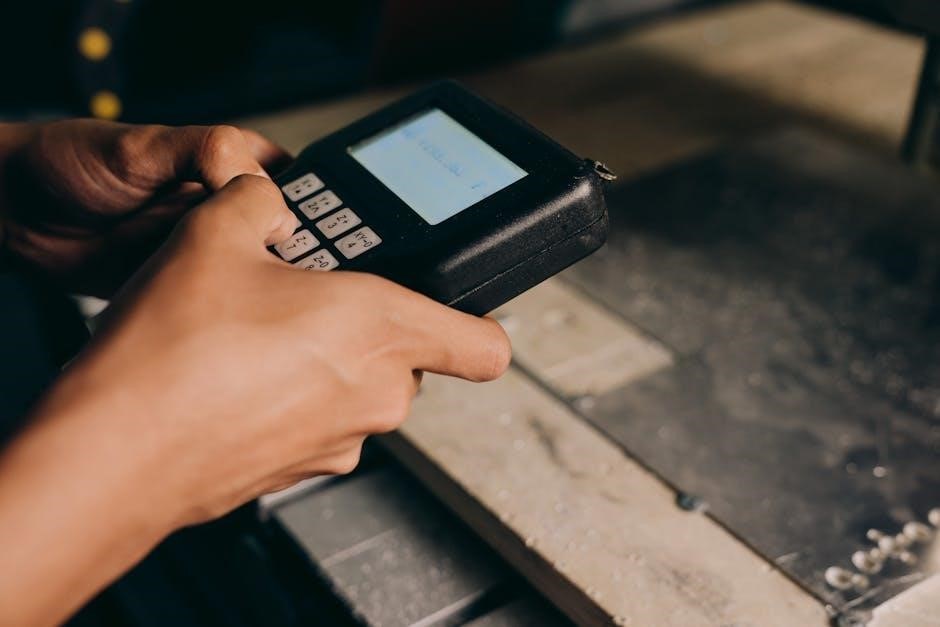
The Hayman Reese Brake Controller is a proportional braking system designed for towing applications․ It features a compact design, making it easy to install on most dashboards․ The controller includes a manual control knob for applying trailer brakes and an LED indicator for status updates․ Suitable for light- to heavy-duty towing, it ensures smooth braking by adjusting to the vehicle’s speed․ Its user-friendly interface and digital display simplify setup and monitoring, providing a reliable solution for safe and efficient towing experiences․
1․2 Importance of Proper Brake Control
Proper brake control is essential for safe and efficient towing; It ensures synchronized braking between the vehicle and trailer, reducing wear on brakes and tires․ Incorrect settings can lead to unsafe towing conditions, potentially causing accidents․ The Hayman Reese Brake Controller helps maintain control by adjusting brake force proportionally to speed and weight․ Proper setup and adjustment are critical to ensure smooth, balanced braking, enhancing overall towing stability and protecting both the vehicle and trailer from damage․

Safety Precautions and Warnings
Always consult the owner’s manual and ensure proper brake controller setup․ Test brake settings before towing and avoid incorrect installation to prevent accidents and damage․
2․1 General Safety Guidelines
Always follow proper installation and setup procedures for the Hayman Reese Brake Controller․ Regularly inspect the unit, wiring, and connections to ensure reliability․ Test brake functionality before towing to avoid accidents․ Never override safety features, and consult the manual for specific guidelines tailored to your vehicle and trailer setup․ Proper maintenance ensures optimal performance and safety while towing․
2․2 Pre-Installation Checks
Before installing the Hayman Reese Brake Controller, ensure your vehicle and trailer are compatible․ Verify the electrical system can support the controller․ Inspect the wiring harness for damage and proper connections․ Check the fuse block for missing fuses or relays․ Consult the vehicle-specific manual for towing capacity and requirements․ Test the brake controller with the trailer attached to ensure proper function․ Proper preparation ensures a safe and reliable installation process․

Components of the Hayman Reese Brake Controller
The Hayman Reese Brake Controller includes a compact control unit, manual control knob, LED indicator, and wiring harness․ These components work together to regulate trailer braking efficiently․
3;1 Brake Control Unit
The Brake Control Unit is the core component of the Hayman Reese system, responsible for processing brake signals․ It features a compact design, making it suitable for various vehicle dashboards․ The unit includes advanced proportional braking technology, ensuring smooth and controlled trailer braking․ It is compatible with both light-duty and heavy-duty applications, offering versatility for different towing needs․ Proper installation and configuration are essential for optimal performance․
3․2 Manual Control Knob
The Manual Control Knob is located on the front right side of the Brake Control Unit․ It allows for manual activation of the trailer brakes, providing additional control during towing․ The knob operates independently of the vehicle’s brakes and is ideal for situations requiring precise braking․ It features a smooth, intuitive design for easy adjustment and complements the automatic braking system․ Proper use ensures safe and efficient trailer braking in various towing conditions․
3․3 LED Indicator
The LED Indicator on the Hayman Reese Brake Controller provides visual feedback on system status․ It displays power, braking activity, and error notifications․ Green indicates normal operation, while red signals issues like short circuits or lost connections․ This feature ensures quick diagnostics and enhances user confidence․ The LED’s clear visibility helps monitor the brake system’s functionality, ensuring safe and reliable towing experiences․ Regular checks of the LED are recommended to maintain optimal performance and address potential problems promptly․
3․4 Wiring and Harness
The wiring and harness for the Hayman Reese Brake Controller are designed for seamless integration with your vehicle’s electrical system․ A plug-and-play harness is available for many vehicles, simplifying installation․ Proper wiring connections ensure reliable communication between the controller and trailer brakes․ Regular inspection of wires and connectors is essential to prevent corrosion or damage․ Follow the provided wiring diagram to avoid errors․ Secure all connections tightly to maintain consistent braking performance and safety while towing․ Ensure no wires are pinched or exposed during installation․

Installation Instructions
Mounting location selection, unit installation, wiring connections, and brake system testing are key steps․ Ensure all components are securely fastened and connections are proper․ Follow the manual․
4․1 Choosing the Mounting Location
Select a mounting location for the Hayman Reese Brake Controller that ensures easy access and clear visibility․ The unit should be installed near the driver’s dashboard for convenience․ Ensure the area is flat, dry, and free from obstructions․ Avoid locations exposed to water or extreme temperatures; The compact design allows installation in tight spaces, making it suitable for most vehicle dashboards․ Proper placement is crucial for safe and effective operation of the brake control system․
4․2 Physical Installation of the Unit
Mount the Hayman Reese Brake Controller securely to the dashboard using screws or adhesive strips․ Ensure the unit is level and firmly attached․ Connect the manual control knob and LED indicator to the main unit․ Route wiring neatly and avoid pinching or damaging cables․ Secure all components with provided brackets or clips․ Double-check all connections for tightness and proper alignment before finalizing the installation․ Follow the manufacturer’s guidelines to ensure a stable and durable setup․
4․3 Wiring Connections and Setup
Connect the wiring harness to the vehicle’s electrical system, ensuring the brake control unit is linked to the brake light switch and battery․ Use the plug-and-play harness for a straightforward setup․ Secure all wires to prevent damage and interference․ Connect the manual control knob and LED indicator to the main unit․ Test the wiring by activating the brakes to ensure proper functionality․ Refer to the vehicle-specific wiring diagram for accurate connections and verify all circuits are properly linked before operation․

Setting Up the Brake Controller
Begin with initial configuration by initializing the unit․ Adjust brake sensitivity to match towing conditions․ Synchronize vehicle and trailer brakes for smooth operation․
5․1 Initial Configuration
Start by powering on the brake controller and ensuring all connections are secure․ Access the menu to set basic parameters like trailer type and brake sensitivity․ Use the manual control knob to navigate settings․ Save configurations to ensure proper operation․ Consult the user manual for detailed steps to complete the initial setup successfully․ Proper configuration ensures optimal braking performance and safety during towing․
5․2 Adjusting Brake Sensitivity
Adjust brake sensitivity using the manual control knob to ensure proper braking force․ Turn clockwise to increase sensitivity for heavier trailers or downhill driving․ Counterclockwise reduces sensitivity for lighter loads․ Use the LED indicator to monitor settings; it flashes when adjustments are made․ Test brakes after changes to confirm responsiveness․ Proper sensitivity ensures smooth, balanced braking, preventing over- or under-braking scenarios․ Always refer to the user manual for specific calibration instructions tailored to your setup․
5․3 Synchronizing with Vehicle Brakes
Synchronize the brake controller with your vehicle’s braking system to ensure harmonious engagement․ Use the manual control knob to adjust sensitivity, matching your vehicle’s brake response․ The LED indicator will confirm synchronization by displaying a steady light․ Test the setup by driving with the trailer attached, gradually applying brakes to ensure smooth, proportional stopping․ Proper synchronization enhances towing safety and stability, reducing the risk of trailer skidding or uneven brake engagement․

Understanding the Controls and Indicators
The Hayman Reese Brake Controller features a manual control knob, LED indicator, and digital display․ These components work together to provide precise control and real-time feedback for safer towing․
6․1 Manual Control Functionality
The manual control knob on the Hayman Reese Brake Controller allows for instant activation of the trailer brakes․ Located on the front of the unit, it enables direct control over the braking system, independent of the vehicle’s brakes․ This feature is particularly useful in emergencies or when additional braking force is needed․ The manual control operates proportionally, ensuring smooth and precise braking․ Always test the manual control functionality after installation to ensure proper operation and safety while towing․
6;2 Digital Display and Readouts
The digital display on the Hayman Reese Brake Controller provides clear, real-time information about your braking system․ It shows settings, voltage, and error codes, ensuring you stay informed while towing․ The display is easy to read and offers instant feedback, allowing you to adjust settings as needed․ Regular checks of the display help maintain optimal braking performance and address any issues promptly․ The digital interface enhances control and safety, making it a reliable feature for towing applications․
6․3 LED Indicator Statuses
The LED indicators on the Hayman Reese Brake Controller provide visual feedback on system status․ A steady green light indicates normal operation, while a flashing red light signals active braking․ Amber lights may indicate issues like low voltage or connectivity problems․ These indicators help users quickly assess the controller’s functionality and address potential issues without relying solely on the digital display․ Regular monitoring of the LED statuses ensures safe and efficient towing operations․

Operating the Brake Controller
Engage brakes automatically when slowing down or use the manual override for emergencies․ Monitor performance via LED indicators, ensuring smooth, controlled braking for safe towing experiences always․
7․1 Engaging and Disengaging Brakes
Engaging the brakes occurs automatically as the vehicle slows down, with proportional braking force applied to the trailer․ The manual override allows instant activation of trailer brakes in emergencies․ When disengaging, ensure the vehicle and trailer come to a complete stop before releasing the brake controller․ Use the LED indicators to confirm brake status․ Always test the brakes after setup to ensure proper function and safety․ Proper engagement and disengagement are crucial for safe towing operations․
7․2 Using the Manual Override
The manual override feature allows you to apply the trailer brakes independently of the vehicle’s brakes․ Located on the front of the control unit, it ensures instant braking in emergencies․ To use it, simply move the manual control knob clockwise to engage the trailer brakes․ The LED indicator will illuminate, confirming activation․ Release the knob to return to automatic mode․ This feature is essential for maintaining control during sudden stops or uneven terrain, enhancing overall towing safety and stability․ Always test the manual override after setup to ensure proper function․ Regular checks are recommended to maintain reliability․
7․3 Monitoring Brake Performance
Regularly monitoring your Hayman Reese Brake Controller ensures optimal braking performance․ After connecting your trailer, always test the brakes by applying them gently․ Use the manual control knob to check responsiveness․ The LED indicator will flash during braking, confirming functionality․ Monitor the digital display for any error codes or unusual readings․ Perform visual inspections of wiring and connections to prevent wear or damage․ Test the brakes on different terrains to ensure consistent performance․ This proactive approach helps identify issues early, ensuring safe and reliable towing experiences․ Always refer to the user manual for specific testing procedures․

Troubleshooting Common Issues
Common issues include no power, incorrect braking, or error codes․ Check fuse blocks, wiring connections, and ensure settings match your trailer’s configuration․ Consult the manual for detailed troubleshooting steps․
8․1 Diagnosing Brake Controller Problems
Diagnosing issues with the Hayman Reese Brake Controller involves checking the fuse block for missing fuses or relays․ Ensure all wiring connections are secure and free from damage․ If the LED indicator shows error codes, consult the manual for specific troubleshooting steps․ Test the manual control functionality and verify that the brake control unit is properly synchronized with your vehicle’s braking system․ Resetting the unit or consulting vehicle-specific FAQs may also resolve common problems․
8․2 Resetting the Unit
To reset the Hayman Reese Brake Controller, disconnect the battery for 30 seconds to clear any temporary glitches․ After reconnecting, test the brakes to ensure proper function․ If issues persist, consult the owner’s manual for specific reset procedures, which may vary by model․ Resetting can resolve software-related problems or incorrect settings without requiring advanced tools․ Always refer to the manual for detailed instructions tailored to your specific unit․
8․3 Checking for Faulty Connections
Inspect the wiring harness and connections for damage, corrosion, or looseness․ Ensure all plugs and sockets are securely connected․ Check the fuse block for missing fuses or tripped circuits․ Verify the brake control unit’s power supply and ground connections are intact․ If issues persist, consult the owner’s manual for specific troubleshooting steps․ Testing the brake function after reconnecting any loose wires can confirm if the problem is resolved․ Persistent issues may require professional assistance to diagnose and repair faulty components․
Maintenance and Care
Regularly clean the unit to prevent dust buildup․ Check for software updates and install them as needed․ Schedule inspections to ensure proper function and safety․
9․1 Cleaning the Unit
Regularly clean the Hayman Reese Brake Controller to ensure optimal performance․ Use a soft cloth and mild detergent to wipe down the unit․ Avoid harsh chemicals or water immersion․ Gently clean electrical connections with a dry cloth․ After cleaning, test the unit to confirm proper function․ Refer to the owner’s manual for specific cleaning instructions tailored to your model․
9․2 Updating Software (if applicable)
Some Hayman Reese Brake Controller models may require software updates for optimal performance․ Check the manufacturer’s website for the latest updates․ Use a compatible computer and follow the instructions provided in the user manual․ Ensure the unit is properly connected and powered during the update process․ After installation, test the controller to confirm proper function․ Always adhere to the manufacturer’s guidelines to avoid any potential issues during the update process․
9․3 Regular Inspection Schedule
Regular inspections ensure the Hayman Reese Brake Controller functions properly․ Check the wiring and connections monthly for wear or damage․ Inspect the control unit and manual knob every 3 months for dust or debris․ Annually, examine the wiring harness for signs of wear and tear․ Also, verify that all software updates are installed, if applicable․ Keep a record of inspections to track maintenance and ensure optimal performance over time․

Vehicle-Specific Considerations
The Hayman Reese Brake Controller is compatible with various vehicles, including heavy-duty models․ Ensure proper setup for your vehicle type, adjusting settings for trailer weight and braking performance․
10․1 Compatibility with Different Vehicles
The Hayman Reese Brake Controller is designed to be compatible with a wide range of vehicles, from light-duty passenger cars to heavy-duty trucks․ Its universal plug-and-play harness simplifies installation across various makes and models․ The controller’s compact design ensures it can be mounted in almost any dashboard configuration․ Whether towing a small trailer or a heavy-duty load, the system adapts to the vehicle’s braking needs, providing proportional control for safe and efficient towing experiences․
10․2 Special Setup for Heavy-Duty Vehicles
For heavy-duty vehicles, the Hayman Reese Brake Controller requires specific adjustments to handle increased weight and braking demands․ Users should consult the vehicle’s manual for towing capacity and brake system requirements․ The controller’s sensitivity and synchronization settings may need fine-tuning to ensure optimal performance with heavy loads․ Additional hardware, such as upgraded wiring or relays, might be necessary for compatibility․ Always follow manufacturer guidelines for heavy-duty applications to ensure safety and reliability while towing․
10․3 Adjustments for Trailer Weight
Adjusting the Hayman Reese Brake Controller for trailer weight ensures balanced braking performance․ Heavier trailers may require increased braking force, while lighter loads need less․ Use the manual control knob to fine-tune sensitivity settings based on trailer weight and towing conditions․ The digital display provides real-time feedback, allowing precise adjustments․ Always test brake performance after adjusting settings to ensure safe and efficient towing․ Proper calibration prevents jerky stops or inadequate braking, enhancing overall control and safety on the road․
The Hayman Reese Brake Controller offers reliable, precise braking control, enhancing safety and towing efficiency․ Proper setup and regular maintenance ensure optimal performance for all towing needs․
11․1 Final Tips for Optimal Use
- Always test brake settings before towing to ensure proper synchronization․
- Regularly inspect and clean the unit to maintain functionality․
- Use the manual control knob sparingly to avoid wear on trailer brakes․
- Adjust sensitivity based on trailer weight and towing speed for smooth braking․
- Consult the owner’s manual for vehicle-specific configurations․
- Monitor the LED indicators for real-time feedback on brake performance․
- Keep software updated if applicable for enhanced features․
- Contact Hayman Reese support for troubleshooting or advanced setups․
11․2 Contact Information for Support
For assistance with your Hayman Reese Brake Controller, contact their customer support team:
- Phone: 1-800-HAYMAN-1 (1-800-429-6261)
- Email: support@haymanreese․com
- Website: www․haymanreese․com
- Address: Hayman Reese, 1500 Hayes Ave, Elkhart, IN 46516
Consult the owner’s manual for specific troubleshooting guides or visit their website for detailed support resources․