Daisy Chain Bracelet Tutorial: A Comprehensive Guide
Explore delightful floral designs! Learn to craft charming bracelets featuring classic five-petal daisies, alternating bead sizes, and intricate seed bead detailing for unique beauty.
Daisy chain bracelets, a timeless craft, evoke nostalgia and springtime charm. This tutorial delves into creating these beautiful accessories, focusing on simple beaded flower patterns that are perfect for beginners and experienced crafters alike. The technique, rooted in traditional daisy chain making, is wonderfully adapted using beads to produce durable and visually appealing bracelets.
Historically, children created daisy chains by threading live daisies together, forming delicate necklaces or bracelets. Today, we elevate this classic craft with the longevity and variety offered by beads. These bracelets aren’t just accessories; they’re miniature works of art, allowing for endless customization through color, bead type, and pattern complexity.
This guide will walk you through the fundamental stitch, enabling you to construct stunning floral designs. We’ll explore classic five-petal daisies, innovative alternating bead size techniques, and the delicate detail achievable with seed beads. Prepare to unlock your creativity and craft beautiful, personalized bracelets!
Materials Needed for a Simple Daisy Chain Bracelet
To begin crafting your beaded daisy chain bracelet, gather these essential materials. You’ll require beading thread – a strong, flexible option like Nymo or FireLine is recommended. Approximately 6-8 feet of thread will suffice for an average-sized bracelet. Next, select your beads; size 8/0 or 11/0 seed beads are ideal for the flower petals, while larger beads can form the flower centers.
A beading needle, thin enough to pass through the bead holes multiple times, is crucial. Scissors for precise thread cutting are also necessary. For finishing, you’ll need a clasp or adjustable closure – a lobster clasp, jump rings, or materials for a sliding knot will work.
Optional, but helpful, tools include a bead mat to prevent rolling, and bead stoppers to secure beads during the process. Consider a thread conditioner to reduce tangling and increase thread strength. Having these supplies readily available will ensure a smooth and enjoyable crafting experience.
Bead Selection: Types and Colors
Choosing the right beads is key to a beautiful daisy chain bracelet. Seed beads, particularly size 8/0 or 11/0, are popular for their delicate size and versatility, perfect for forming the petals. Czech glass beads offer vibrant colors and consistent shapes. For flower centers, consider larger round beads, pearls, or even small charms.

Color palettes are endless! Classic white and yellow evoke traditional daisies, while pastels create a softer look. Experiment with contrasting colors for a modern twist. Iridescent beads add a shimmering effect, enhancing the floral design. Don’t be afraid to mix textures – matte, glossy, and metallic beads can create visual interest.
Consider the bead finish; opaque beads provide bold color, while translucent beads allow light to pass through, creating depth. Ultimately, your bead selection should reflect your personal style and the desired aesthetic of your bracelet.
Beading Thread Options: Strength and Durability
Selecting the correct beading thread is crucial for a lasting daisy chain bracelet. Nylon thread, often called S-Lon or KO thread, is a popular choice due to its strength, flexibility, and resistance to abrasion. It’s ideal for intricate designs and holds knots securely.
FireLine thread, a fused polyethylene fiber, offers exceptional strength and minimal stretch, making it suitable for bracelets with heavier beads. WildFire thread is another strong option, known for its vibrant colors and smooth texture.
Thread thickness matters; thinner threads are easier to pass through small beads, while thicker threads provide greater durability. Consider the bead size and weight when choosing your thread. Always pre-stretch your thread to prevent loosening after completion. A strong, durable thread ensures your beautiful floral creation withstands daily wear.
Basic Daisy Chain Stitch Technique
Master the foundational stitch! Begin by preparing your thread, forming an ‘X’ with initial beads, and adding subsequent beads to build the delicate chain.
Step 1: Preparing the Beading Thread
Selecting and Cutting Your Thread: Begin your daisy chain bracelet journey by choosing a suitable beading thread. Consider the bead size and weight when making your selection; a stronger thread is necessary for heavier beads. Cut a generous length of thread – approximately arm’s length – to provide ample working room; This prevents frequent thread changes during the process, ensuring a smoother workflow.
Securing the Thread: To prevent unraveling, gently apply a small amount of clear nail polish or thread conditioner to the ends of the cut thread. This will stiffen the ends, making them easier to thread through beads. Alternatively, you can carefully tie a small knot at one end, leaving a small loop for later attachment. Ensure the knot is secure but not overly bulky, as it will need to pass through beads.
Threading the Needle: Thread one end of the prepared thread through a beading needle. The needle size should correspond to the hole size of your chosen beads. A needle that is too large will create excessive space, while one that is too small will be difficult to use.
Step 2: Initial Bead Placement ⏤ Forming the ‘X’
Creating the Foundation: The ‘X’ formation is the cornerstone of the daisy chain technique. Take your threaded needle and pass it through the first bead. Then, pass the needle back through the same bead, creating a loop. This initial step secures the first bead and establishes the starting point for your chain. Ensure the bead sits centrally on the thread, leaving equal lengths of thread on either side.
Tightening the Loop: Gently pull both ends of the thread to tighten the loop around the bead. This creates the foundational ‘X’ shape. Avoid pulling too tightly, as this can distort the bead’s shape or cause the thread to break; The goal is a snug, secure fit without excessive tension.
Preparing for the Chain: This ‘X’ serves as the anchor for subsequent beads. Maintain consistent tension on the thread ends as you proceed, ensuring the ‘X’ remains stable and doesn’t unravel. This initial step is crucial for a well-formed and durable daisy chain bracelet.
Step 3: Adding Subsequent Beads ⏤ The Chain Begins
Extending the Chain: Now, take one thread end and pass it through the next bead. Before fully tightening, bring that same thread back through the previous bead – the one forming part of the ‘X’. This creates a new loop around the second bead, linking it to the first. Repeat this process with the opposite thread end, adding another bead and looping it back through the initial ‘X’ bead.
Alternating Sides: Continue alternating thread ends, adding beads one at a time and looping them back through the original ‘X’. This consistent back-and-forth motion builds the daisy chain structure. Each bead added reinforces the chain’s integrity.
Visualizing the Pattern: As you add beads, you’ll begin to see the chain emerge. Maintain even tension to ensure a uniform appearance. This step is where your chosen flower pattern – whether a classic five-petal design or a more intricate arrangement – truly begins to take shape.
Step 4: Maintaining Consistent Tension
The Key to a Polished Look: Consistent tension is paramount for a beautiful daisy chain bracelet. Too loose, and the beads will shift and the chain will appear flimsy. Too tight, and the thread may break or distort the bead shape. Aim for a gentle, even pull with each bead addition.
Finding Your Rhythm: Practice makes perfect! As you add beads, develop a rhythm for tightening the thread. A slight tug after each loop secures the bead without overstressing the material. Regularly check the chain’s overall appearance, ensuring beads lie flat and are evenly spaced.

Adjusting as You Go: If you notice tension becoming uneven, gently loosen or tighten the surrounding beads to compensate. This proactive approach prevents significant issues later on. Remember, a well-tensioned chain is both visually appealing and structurally sound, enhancing the longevity of your floral bracelet.
Simple Beaded Flower Patterns
Unleash your creativity! Discover easy-to-follow patterns for classic daisies, designs with varied bead sizes, and charming details using delicate seed beads.
Daisy Flower Pattern 1: Classic Five-Petal Design
Creating the quintessential daisy is a fantastic starting point! This pattern focuses on simplicity and elegance, utilizing a consistent bead size to achieve a traditional look. Begin by forming the central ‘X’ of your daisy chain, as outlined in the basic technique.
For each petal, add a single bead to each strand of your beading thread, pulling gently to maintain tension. Repeat this process four more times, ensuring even spacing between each bead. This will create the five petals radiating from the center.
Consider using white or cream-colored beads for a classic daisy appearance, or experiment with pastel shades for a softer aesthetic. Once all five petals are in place, continue adding beads to extend the chain, or prepare to begin a new flower. This pattern is incredibly versatile and forms the foundation for more complex designs. Remember consistent tension is key for a polished finish!
Daisy Flower Pattern 2: Alternating Bead Sizes
Introduce visual interest with varying bead dimensions! This pattern builds upon the classic five-petal design, adding depth and texture by incorporating beads of different sizes. Begin with the central ‘X’ as before, then alternate between larger and smaller beads for each petal.
For example, use a 6mm bead followed by a 4mm bead, repeating this sequence four more times to complete the flower. This creates a subtle gradient effect, mimicking the natural variation in daisy petals. Experiment with different size combinations to achieve your desired look.
Consider using beads within the same color family for a harmonious blend, or contrasting colors for a bolder statement. This technique adds a sophisticated touch to your daisy chain bracelet. Maintaining consistent tension remains crucial, even with varying bead sizes, to ensure a neat and professional finish.
Daisy Flower Pattern 3: Using Seed Beads for Detail
Elevate your daisy designs with delicate seed bead accents! This pattern focuses on adding intricate details to your flowers using tiny seed beads. After forming the initial five-petal daisy with standard beads, incorporate seed beads around the center ‘X’ or along the edges of each petal;
String a few seed beads onto your thread between each larger bead, creating a subtle halo effect. Alternatively, use seed beads to outline the petals, defining their shape and adding a touch of sparkle. Experiment with different seed bead colors – a contrasting hue can highlight the petals, while a complementary shade creates a softer look.
Remember that seed beads are small, so patience and a fine beading needle are essential. Consistent tension is even more critical when working with seed beads to prevent looseness. This technique transforms simple daisies into miniature works of art!
Bracelet Closure Techniques
Secure your floral creations! Discover adjustable sliding knots, lobster clasp attachments, and convenient elastic cord options for comfortable, lasting wear and easy on/off.
Adjustable Sliding Knot Closure
Creating a secure and adaptable finish for your daisy chain bracelet is easily achieved with a sliding knot. This technique allows the wearer to customize the fit, making it perfect for various wrist sizes. Begin by cutting a length of beading thread, approximately 20-24 inches, ensuring it’s long enough to work with comfortably.
Fold the thread in half, creating a loop, and pass both ends through the bead ends of your bracelet. Next, form a simple overhand knot, leaving a small loop. Continue creating several more overhand knots, sliding them down towards the bracelet ends with each knot tied.
The key is to maintain consistent tension as you tie each knot, ensuring a smooth and even sliding motion. Once you’ve created enough knots to form a secure slider, trim the excess thread, leaving a small tail. This closure is ideal for showcasing the delicate beauty of your beaded flower patterns, offering both functionality and aesthetic appeal.
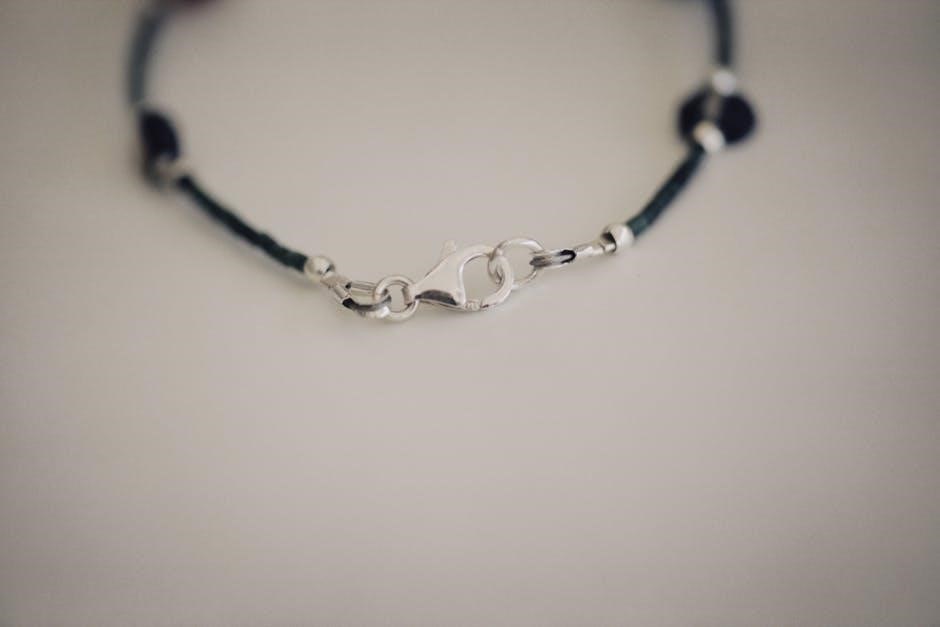
Lobster Clasp and Jump Ring Attachment
For a classic and reliable closure, consider using a lobster clasp and jump ring. This method provides a secure fastening, ideal for showcasing your carefully crafted daisy chain bracelet and its delicate flower patterns. Begin by threading a length of beading thread through the end beads of your bracelet, creating a secure loop.
Open a jump ring using pliers – gently twist, don’t pull apart. Attach the jump ring to the thread loop on the bracelet and then to the lobster clasp. Ensure the clasp moves freely. Repeat this process on the opposite end of the bracelet, creating a matching loop for the clasp to connect to.
Secure the thread ends with a tiny drop of jewelry glue to prevent unraveling. This method offers a polished finish, complementing the intricate details of your beaded floral designs and ensuring lasting wear.
Elastic Cord Option for Stretch Bracelets
For a quick and comfortable fit, elastic cord is an excellent choice, particularly when creating bracelets showcasing simple beaded flower patterns. Select a high-quality elastic cord with sufficient stretch and durability to accommodate the beads and withstand regular wear. Measure your wrist and add approximately 1-2 inches to determine the cord length.
String your daisy chain beads onto the elastic cord, ensuring a snug but not overly tight fit. Once all beads are strung, carefully tie a secure knot – a surgeon’s knot is recommended for extra strength. Add a tiny drop of jewelry glue to the knot for added security.
Trim the excess cord, concealing the knot within the nearest beads. This method creates a bracelet that easily slips on and off, perfect for everyday wear and displaying your charming floral creations.
Advanced Techniques & Variations
Elevate your designs! Experiment with diverse bead shapes, charming pendants, and multi-strand constructions to create truly unique and personalized daisy chain bracelets.
Incorporating Different Bead Shapes
Beyond the round: While traditional daisy chain bracelets often utilize round beads, venturing into diverse shapes unlocks a world of creative possibilities. Consider incorporating teardrop beads to mimic delicate petals, adding a touch of elegance and asymmetry to your floral designs. Square or cube beads can provide a modern, geometric contrast, creating a visually striking focal point within the chain.
Experiment with textures: Explore beads with faceted surfaces to catch the light and add sparkle, or opt for matte finishes for a more subdued, organic look. Seed beads, though small, are incredibly versatile – use them to outline flower petals, fill gaps, or create intricate patterns around larger beads. Don’t be afraid to mix and match shapes and sizes; a combination of round, teardrop, and seed beads can result in a beautifully textured and dynamic bracelet. Remember to adjust your threading technique slightly when working with non-round beads to ensure a smooth and consistent chain.
Consider the overall aesthetic: The choice of bead shape should complement the overall style of your bracelet. For a whimsical, cottagecore vibe, opt for floral-shaped beads or pastel-colored teardrops. For a more sophisticated look, consider using geometric shapes in metallic tones.
Adding Charms and Pendants
Personalize your blooms: Elevate your daisy chain bracelets beyond simple floral patterns by incorporating charms and pendants that reflect your personal style. Delicate floral charms, naturally, complement the daisy theme, enhancing the bracelet’s romantic aesthetic. Consider miniature butterflies, ladybugs, or leaf charms for a whimsical touch.
Focal points and storytelling: A small pendant can serve as a focal point, drawing the eye and adding visual interest. Choose pendants with meaningful symbols or gemstones that resonate with you. Jump rings are essential for securely attaching charms and pendants to the daisy chain. Ensure the jump rings are closed tightly to prevent loss.
Balance and placement: When adding charms, consider the weight distribution and overall balance of the bracelet. Avoid overcrowding one area; space them evenly for a harmonious look. Experiment with placement – a single pendant centered on the bracelet or a cluster of smaller charms can both create stunning effects.
Creating Multi-Strand Daisy Chain Bracelets
Amplify the floral effect: Take your daisy chain bracelet designs to the next level by creating multi-strand pieces. This technique adds depth, texture, and visual impact, resulting in a more luxurious and eye-catching accessory. Begin by creating multiple daisy chains, varying the bead colors or sizes for added interest.
Secure connections: Carefully connect the strands using jump rings or small beads woven between them. Ensure the connections are secure to prevent the strands from separating during wear. Consider using a focal clasp that accommodates multiple strands, or create a custom closure with several jump rings.
Layering and arrangement: Experiment with different arrangements of the strands – a symmetrical design with an even number of chains, or an asymmetrical arrangement for a more modern look. Varying the lengths of the strands can also create a cascading effect, enhancing the bracelet’s overall aesthetic.
Troubleshooting Common Issues
Address crafting challenges! Resolve bead slippage with secure knots, prevent tangles using thread conditioner, and achieve even spacing through consistent tension control.
Beads Slipping or Loosening
Addressing Bead Security: A common frustration in daisy chain bracelet making is beads gradually slipping or becoming loose, compromising the flower’s form and the bracelet’s overall integrity. This often stems from insufficient knot tightness or thread inconsistencies. Ensure robust knots! After each bead placement, particularly at the ‘X’ formation and subsequent additions, firmly tighten the knot. Double-knotting can provide extra security, especially with smoother bead types.
Thread Considerations: The type of beading thread significantly impacts bead retention. Lower quality threads may stretch or fray, leading to loosening. Opt for durable, pre-waxed beading thread designed for intricate work. Waxing the thread yourself with beeswax can further enhance grip and reduce slippage. Regularly check your thread for wear and tear, replacing it if necessary. Consistent Tension is Key: Maintaining even tension throughout the entire process is crucial. Uneven tension can cause some beads to be looser than others. Practice consistent pulling force to ensure a uniform and secure chain.
Final Check: Before finalizing your bracelet, gently tug on each bead to assess its security. If any beads move easily, reinforce the knot or consider re-threading that section.
Thread Tangling and Breaking
Managing Thread Challenges: Thread tangling and breakage are frequent hurdles when crafting daisy chain bracelets, particularly with intricate floral patterns. Preventative Measures: Begin with a generous length of thread to minimize the need for frequent re-threading, which can introduce new tangles. Work on a clean, flat surface, free from obstructions that could snag the thread.
Untangling Techniques: If tangling occurs, resist forceful pulling, as this can weaken or break the thread. Gently separate the strands, using a needle or pin to carefully loosen knots. Thread Quality Matters: Inferior thread is prone to fraying and breaking. Invest in high-quality, pre-waxed beading thread specifically designed for delicate work.
Waxing for Strength: Applying beeswax to the thread adds strength and reduces friction, minimizing both tangling and breakage. Consistent Tension: Avoid excessive pulling, which strains the thread. Maintain consistent, moderate tension throughout the beading process. If the thread breaks, carefully re-thread, ensuring a secure knot at the starting point.
Achieving Even Bead Spacing
Consistent Spacing is Key: Uniform bead spacing elevates the aesthetic of your daisy chain bracelet, especially when creating delicate floral patterns. The Sliding Method: After adding each bead, gently slide it into position against its neighbor, ensuring a consistent gap between each one. Avoid pulling the thread too tightly, which can compress the beads and distort the spacing.
Using a Bead Board: Employing a bead board can be incredibly helpful for pre-planning your design and visualizing the spacing before stringing. Regular Checks: Periodically step back and assess the bracelet’s overall appearance, identifying any areas where the spacing appears uneven.
Gentle Adjustments: Make small, incremental adjustments to the bead positions as you work. Thread Tension: Maintaining consistent thread tension is crucial; too loose, and the beads will be floppy, too tight, and they’ll bunch together. Practice makes perfect – with each bracelet, your spacing will become more refined!
Care and Maintenance of Your Bracelet
Preserve your floral artistry! Gently clean with a soft cloth, store safely away from direct sunlight, and protect the delicate thread from damage.
Cleaning Your Beaded Bracelet
Maintaining the vibrancy of your daisy chain bracelet is essential for its longevity. Regular, gentle cleaning will remove dirt, oils, and residue that can dull the beads and weaken the thread. Begin by using a soft, lint-free cloth – microfiber is ideal – dampened with lukewarm water. Avoid harsh chemicals, abrasive cleaners, or ultrasonic cleaners, as these can damage delicate beads and the beading thread.
Gently wipe each bead individually, paying attention to any crevices where dirt might accumulate. For more stubborn grime, you can add a tiny drop of mild dish soap to the water, but ensure it’s thoroughly rinsed away afterward. Never submerge the entire bracelet in water, especially if it contains seed beads or sensitive materials. After cleaning, pat the bracelet dry with another soft cloth and allow it to air dry completely before storing. This prevents moisture buildup, which can lead to thread damage or tarnishing of metal components.
Remember, prevention is key! Avoid wearing your bracelet during activities that expose it to harsh chemicals, excessive sweat, or abrasive surfaces.
Storage Recommendations
Proper storage is crucial for preserving the delicate beauty of your daisy chain bracelet. To prevent tangling, stretching, or damage to the beads and thread, avoid simply tossing it into a jewelry box with other items. Instead, opt for individual storage solutions. A soft pouch made of velvet or felt is an excellent choice, providing cushioning and protection from scratches.
Alternatively, you can store your bracelet in a small, resealable plastic bag, ensuring all air is removed to minimize oxidation. Keep the bracelet away from direct sunlight, extreme temperatures, and humidity, as these can fade colors and weaken the thread. Avoid storing multiple bracelets together in a single bag, as the beads can rub against each other and cause wear.
Consider using a jewelry organizer with individual compartments to keep your bracelets neatly separated and easily accessible. Regular inspection during storage will help identify any potential issues before they worsen, ensuring your floral creation remains stunning for years to come.
Preventing Thread Damage
Protecting the thread is paramount for the longevity of your daisy chain bracelet. Constant friction and stress can cause fraying, weakening, and eventual breakage. Avoid wearing your bracelet during activities that involve rough handling, such as sports, gardening, or cleaning. Chemicals found in lotions, perfumes, and cleaning products can also degrade the thread over time, so apply these before putting on your bracelet.
When not wearing your bracelet, store it properly (see Storage Recommendations) to minimize abrasion. Regularly inspect the thread for any signs of wear, such as fuzziness or thinning. If you notice any damage, consider re-threading the beads before the bracelet breaks completely.
Choosing a high-quality, durable beading thread initially is a proactive step. Avoid excessive stretching or pulling on the bracelet, as this puts undue stress on the thread. Gentle handling and mindful wear will significantly extend the life of your beautiful floral creation.